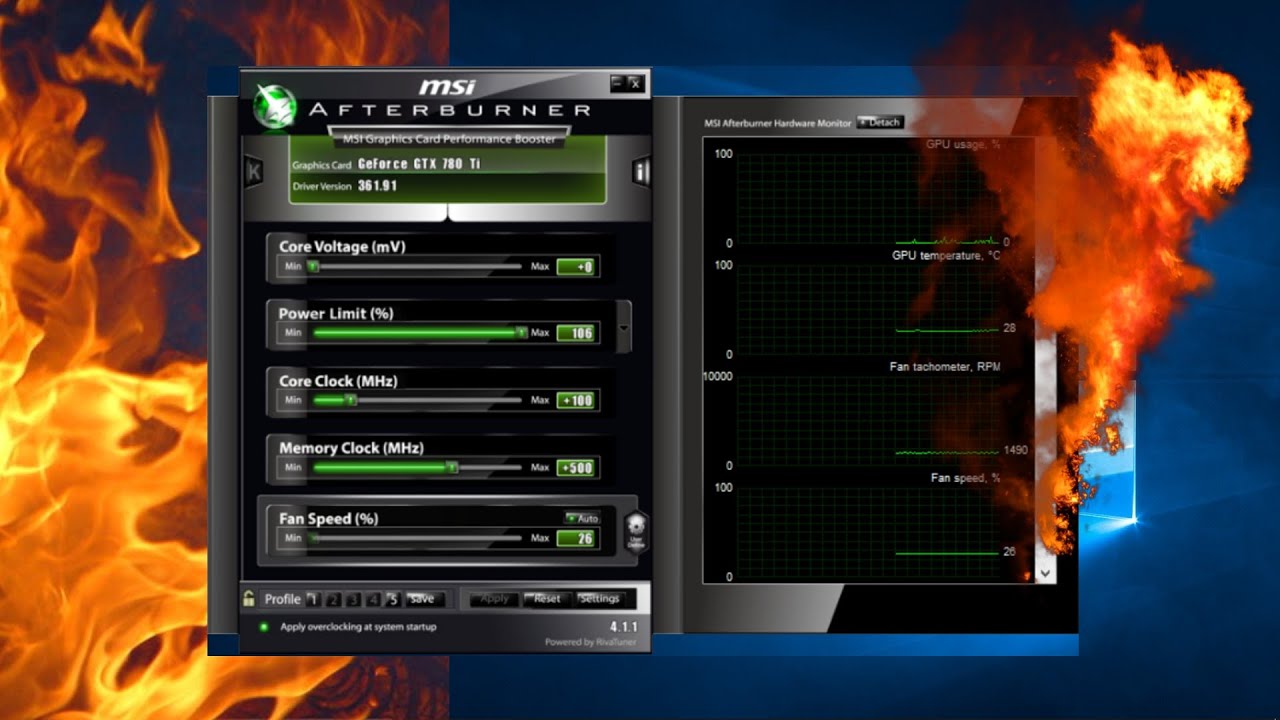
If you run software that requires a heavy graphics card you don’t have, there is one possible solution to your problem: MSI Afterburner. This overclocking application uses your GPU’s and your RAM’s latent strength to make your system cope with software like 3D games, so they run without difficulty.
So don’t rush to the nearest hardware shop for a new graphics card. First, see whether overclocking with MSI Afterburner can solve your problems.
Using Afterburner is child’s play. Just follow the steps below and you’ll be good to go.
Steps to install and activate MSI Afterburner
To download Afterburner, go to MSI’s official site.
The Afterburner setup usually arrives as a ZIP file. Extract the setup file from it.
Once the setup file is extracted, run it.
Go through the required steps of the installation process.
MSI Afterburner is now installed; its icon will appear wherever you chose during installation.
Now, when you open a game that needs extra performance from your graphics card, Afterburner provides the boost — and you control the components of your GPU to keep things in hand. You can manually adjust settings like fan speed and voltage so your PC doesn’t get too hot to handle.
With these steps done, you are ready for overclocking. But it is not a foolproof, danger-free activity. You’ll need to be careful not to overstretch your system and damage important components like your motherboard and hard drive.
What you need to do first is test your graphics card — benchmark it to see how far it can go. From the internet you may get an idea of how much boost Afterburner gives to cards of different capacities (in megahertz terms).
Don’t rely on other people’s results — you need to check your own card’s capacity yourself. Every chip is different. Follow the test sequence below instead.
Remember: MSI Afterburner usually comes with MSI Kombustor, a benchmarking tool. If you don’t have Kombustor, you can download it from the same page where you got Afterburner — or use another benchmarking tool of your choice.
Testing your system before overclocking
Start MSI Afterburner and note your stock speeds. This gives you a fair idea of your card’s current capacity.
Run a benchmarking program — Kombustor, or whichever benchmark came with your setup.
The benchmark displays images that stretch your graphics card to its limit, showing how high your GPU temperatures rise at maximum capacity. It’s useful to set fan speed to 100% in Afterburner so cooling is at its optimum while the card heats up.
If your system passed all the benchmark scenes, your card works comfortably at that level. Now increase the core clock by a small but substantial margin and run the program again.
As long as the benchmark keeps passing, keep increasing the core clock — in small amounts — while watching the fan noise. When problems appear (a dark screen, glitches), stop and return to the last stable setting.
To move further, increase the voltage supplied to your GPU. Afterburner locks core voltage by default — unlock it in Settings. Be careful: raising voltage can also cause damage.
Most graphics cards work well up to 90 °C. Raising voltage raises temperatures, so go slowly. When temperatures get too high to continue, drop back to the last safe voltage level. That is your maximum overclock — note it down.
Now that you’ve established your benchmark, everything is ready. Run your intensive software and use Afterburner to enjoy it to the fullest — then head to module 06 to fine-tune what you’ve found.